MSBA R Bootcamp
1 Installation Information
2 Why R?
In our MSBA program, we teach R because it is a powerful, flexible tool widely used in business analytics for data analysis and visualization. R allows students to apply theoretical concepts to real-world datasets, enhancing their understanding through hands-on practice. Its rich ecosystem of packages, like ggplot2 for visualization and dplyr for data manipulation, makes it ideal for tackling the types of problems analysts face in the field. Additionally, R promotes reproducibility and collaboration through features like R Markdown and RStudio Projects, which align with industry standards. By learning R, students not only gain valuable technical skills but also build a strong foundation for advanced analytics and decision-making in their careers.
R is a very sophisticated statistical software that allows you to enter commands one-at-a-time, or write scripts using the R language.
Easily installed, state-of-the-art, and it is free and open source and supported by a well-established R Community.
R can be used with RStudio, which is a graphical user interface that allows you to do the following:
- write, edit, and execute code;
- generate, view, and store plots;
- manage files, objects and data frames;
- integrate with version control systems.
R comes with community that helps in the development of R resources.
- A package is developed by R users to do one specific thing or a set of related things that could store a collection of functions, data, and code.
- A library is the place where the package is located on your computer.
A repository is a central location where many developed packages are located and available for download. There are 3 big repositories, but we use Comprehensive R Archive Network, or CRAN, which is R’s main repository with over 18,000 packages available.
R’s community is vast, and you can always seek information from the community to try to help you with a R related issue.
3 Installing R
3.1 Installing R on Windows
- Open an internet browser and go to https://www.r-project.org/.
- Click CRAN hyperlink underneath Download on the left.
- Select a CRAN location (a mirror site) and click the corresponding link. I selected O-cloud. This brings you to the following link: https://cloud.r-project.org/
- Click on the “Download R for Windows” link at the top of the page if you have a Windows computer.
- Click on the “install R for the first time” link at the top of the page.
- Click “Download R for Windows” and save the executable file somewhere on your computer.
- Run the .exe file
- Accept all defaults and follow the installation instructions
- Now that R is installed, you need to download and install RStudio.
3.2 Installing R on a Mac
- Open an internet browser and go to https://www.r-project.org/.
- Click CRAN hyperlink underneath Download on the left.
- Select a CRAN location (a mirror site) and click the corresponding link. I selected O-cloud. This brings you to the following link: https://cloud.r-project.org/
- Click on the “Download R for (Mac) OS X” link at the top of the page.
- Click on the file containing the latest version of R under “Files.”
- Save the .pkg file, double-click it to open, and follow the installation instructions.
- Accept the license agreement and all subsequent defaults
- When the installation completes, click Close.
- Now that R is installed, you need to download and install RStudio.
4 Installing R Studio
4.1 Downloading RStudio For Mac or PC
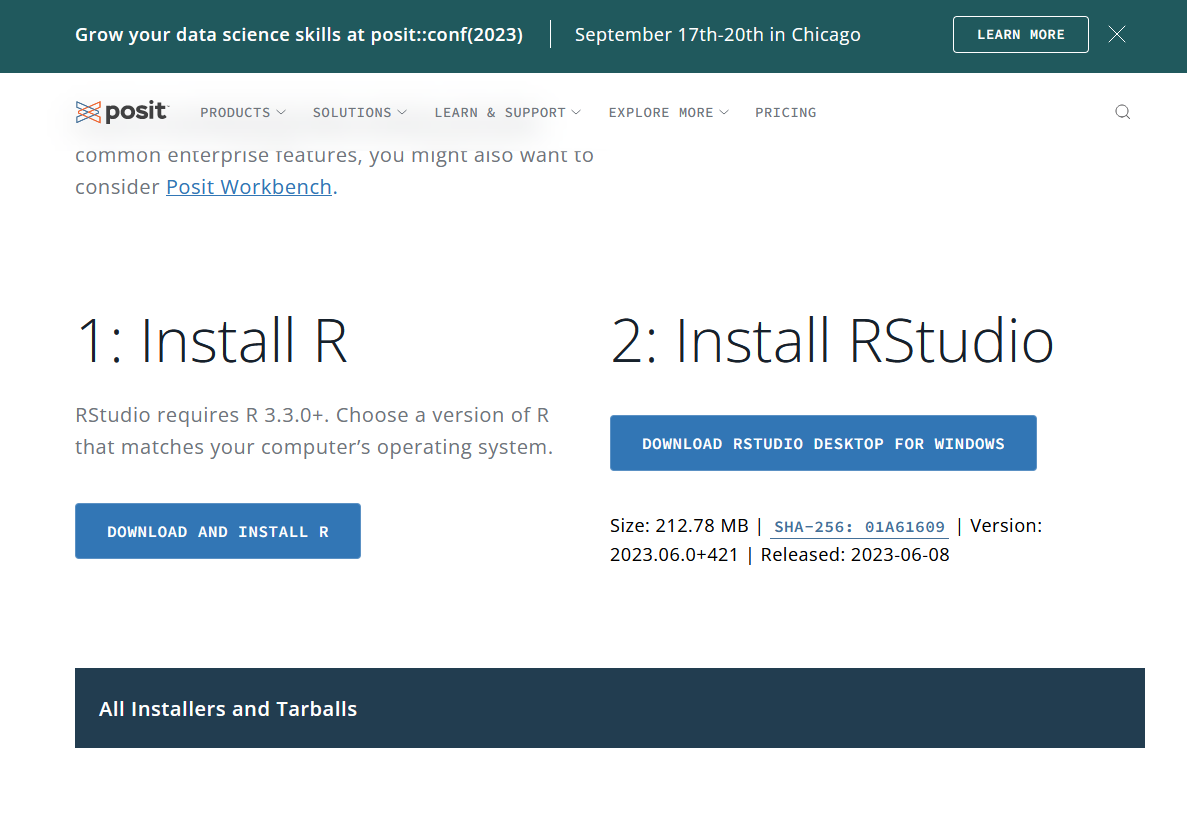
- Go to the following URL: https://posit.co/download/rstudio-desktop/.
- Click the Download button for Install RStudio.
- It should recognize your operating system. If you see different an Installers for Supported Platforms section, click the version that is appropriate for your operating system. When the download is complete, run the install program, accepting all defaults.
- Note, RStudio might conflict with some Mac antivirus programs. Ensure your antivirus is not blocking it from installing. Only worry about this if you have difficulty installing the program.

5 Take Your First Look at R
- On the right, two windows, each with tabs
- There are many ways to customize the look of RStudio for accessibility purposes with a couple being the following:
- You can resize the windows using the splitters.
- You can maximize/restore the windows within the left/right panels using the familiar Windows controls in the upper-right of each window.
- There are many ways to customize the look of RStudio for accessibility purposes with a couple being the following:
- On the left, the Console Window reproduces the R environment.
- Observe the command line with the \(>\) symbol.

6 Summary
- At the end of this section, you should have downloaded and browsed R in RStudio. You should have looked at the quick keys in R to make editing your R documents easier. You should set up a project folder for the course where you want to on your computer, and made your first .R script file located in that project folder. You should have tried a line of code or two as presented. Finally, you should have looked around the RStudio environment and found the help tab.